SO guys today we are taking topic of dark troops as how they can be used to make a perfect attack.......
"Having tamed the fierce leaping hog, the Hog Rider punishes those who hide behind their puny walls! Fueled by Dark Elixir, these warriors
 never known defeat!
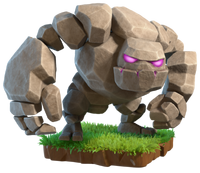
"The mighty Golem loves to soak up damage! When destroyed, it explodes and splits in two. The resulting Golemites have one-fifth the Golem's strength and hitpoints."
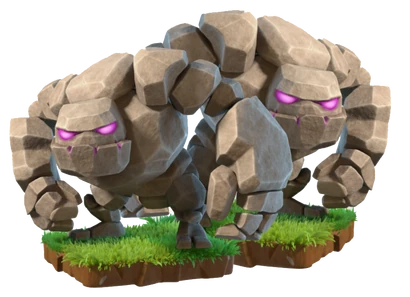
"Golemites are smaller Golems constructed within the gargantuan creature. When the Golem is destroyed, the Golemites spring to life and keep fighting!"
Summary


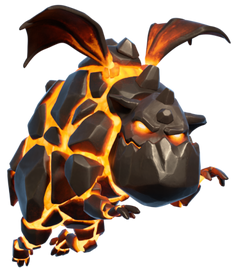
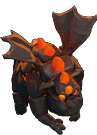
"These fiery beasts can't resist chasing after Air Defenses, providing excellent protection for other troops. Once destroyed, they erupt into many smaller, weaker menaces."

so ok well it finishes here
first of all lets discuss a little about them.....

- Summary
- The Minion is a fast, cheap and relatively weak, ranged flying unit. Its appearance is that of a gargoyle with large horns, stubby wings and large hands with sharp vicious claws that are covered in what seems to be Dark Elixir.
- It is made of Dark Elixir and is trained in the Dark Barracks.
- The Minion's method of attack is spitting Dark Elixir.
- Because it is a flying troop, it cannot be attacked by Cannons, Mortars, Bomb Towers or Ground Mode X-Bows, but is extremely vulnerable to Air Defenses, Wizard Towers, multi-target Inferno Towers and Air Bombs.
- Although out of all Dark Elixir Troops the Minion has the lowest health and does the least damage per second, it has the fastest training time and requires the least housing space. On a per housing space basis, the Minion has the highest DPS of all Dark Elixir Troops (and is fifth among all permanent troops to the Goblin, Wizard, Balloon and Barbarian).
- Seeking Air Mines do not detect Minions, but regular Air Bombs do, and can kill large groups quickly.
- Minions have no preferred target when attacking; they will simply attack the closest building to them. However, once they become aware of enemy Clan Castle troops, Heroes or Skeleton Trap skeletons (either by being attacked themselves or being near another friendly troop under attack), they will leave their previously targeted building and engage the enemy troops instead. Once all of the nearby enemy troops are defeated, they will proceed to attack the nearest building from their current location.
- Offensive Strategy
- It is extremely useful to carry a small number of Minions (10 or so) to pick off buildings that are defended by ground defenses only (Mortars, Cannons, Bomb Towers, and Ground Mode X-Bows).
- Minions are relatively inexpensive and take up only 2 housing spaces, making them well suited to use in a group rush strategy.
- Minions can be destroyed by a single Air Bomb; therefore a good strategy is to deploy them one at a time in different locations to set off the Air Bombs, and then follow up by deploying them massed. Note that you cannot test for Seeking Air Mines in this manner, as these traps do not target Minions.
- As is the case with all flying units, Archer Towers, Wizard Towers and Air Defenses should be taken out before deploying Minions.
- Using Giants as a distraction when using Minions to attack other buildings is a good idea since the Giants will attack the defensive buildings and keep them occupied while the Minions attack all the outside buildings achieving at least 50% damage.
- Note that while Giants can be used to destroy an Air Defense, they will not occupy its attention while it is being attacked (it will still shoot at your Minions).
- Like Balloons, Minions are exceptionally useful in the Single Player Campaign. You can simply destroy all of the Air Defenses, Archer Towers and Wizard Towers, then deploy a single Minion. It will destroy every building. It takes a bit of patience, but it pays off at the end. In the Single Player Campaign, there is no time limit, so one unthreatened Minion will eventually destroy every building.
- Important note: In many cases a single Minion will take enough time to destroy the remaining buildings that your game will time out due to inactivity, which will cause your attack to end prematurely and be unsuccessful (regardless of how many stars you had earned to that point). To prevent this from happening either deploy multiple Minions, move your screen around, tap in the red zone, or simply change the view every few moments by panning or zooming.
- Minions can overpower Air Defenses as they only target one Minion at a time; but beware of Wizard Towers which can vaporize entire swarms of Minions.
- A good way to use minions is to use a meatshield such as Dragons or Lava Hounds as most Air Defenses and Air Bombs can kill Minions very quickly.
- Defensive Strategy
- It is really helpful to have an Air Bomb in case you are attacked by Minions. It's the biggest weak spot for a Minion, especially if the attacker has multiple Minions, as Air Bombs do splash damage and can wipe out an entire group at once. For this reason it is helpful to place the Air Bombs near storages/Town Hall.
- Defend Air Defenses, Wizard Towers, X-Bows, and Archer Towers well so the Minions don't have free rein.
- Minions, although individually weak, are very powerful in large numbers.
- Make sure to protect Archer Towers and Air Defenses with a Wizard Tower which does devastating splash damage to hordes of Minions.
- If your attacker plans on deploying a large number of Minions, they will typically try to trigger your Air Bombs first with single Minions deployed at several points around your base. To counter this, make sure the trigger radius of each Air Bomb is at least behind the first row of defended buildings; this will help ensure that the single Minions will be destroyed by other defenses before they can trigger the Air Bombs.
- Minions are useful in the Clan Castle as they can attack both ground and air units for a decent amount of damage, and can only be hit by Dragons, Archers, Wizards, Baby Dragons, Witches, attacking Minions, the Archer Queen and the Grand Warden.
- Upgrade Differences
- The Minion's appearance changes at levels 3, 5, 6, and 7.
- At level 3, the Minion's skin changes from light blue to royal blue, with its horns and forearms a slightly darker shade of blue.
- At level 5, the Minion's skin turns gray, and its horns and forearms both turn black. The eyes also glow a ghostly white, making it resemble a fully-fledged gargoyle.
- At level 6, the Minion's skin turn reddish purple. Its wings also turn into light coloured purple, similar to Level 2 Dragon.
- At level 7, the Minion becomes a rough orchid. Its horns become orange near the tips, and his wings turn orange.
- The Minion's appearance changes at levels 3, 5, 6, and 7.
- Trivia
- The Minion was added in the 12 March 2013 update.
- Their appearance resembles that of a gargoyle.
- In the Japanese and French language settings of the game, the Minion's name translates literally to "Gargoyle".
- Blue particles can be seen when the spit dark elixir hits the buildings.
- You can have a maximum of 120 Minions at one time in a complete set of fully upgraded Army Camps. This number increases to 137 if you include the 17 that can fit into a level 6 or higher Clan Castle. On the battlefield, you can clone an additional 34 Minions with two fully upgraded Clone Spells.
- Tapping on the Army Camp will make the Minion sneeze Dark Elixir and they sneeze more of it when at level 6 or 7.
- The Minion is the fastest flying unit, and one of the fastest troops overall along with the Goblin.
- The Minion is the only flying troop (excluding subtroops) that is undetectable by the Seeking Air Mine. The Healer was changed to target traps as a part of the August 2016 update.
- As part of the 17 June 2013 update, the colors of the levels 1-2 Minion and the levels 3-4 Minion were swapped. Twister, a Supercell Community Forum moderator, has confirmed that this was an unintended change and was reverted on 24 June 2013.
- The Minion is the first one of two Dark Elixir Troops that can be upgraded to level 7 in the Laboratory, the second is the Hog Rider.
| Preferred Target | Attack Type | Housing Space | Movement Speed | Attack Speed | Dark Barracks Level Required | Range |
|---|---|---|---|---|---|---|
| None | Ranged (Ground & Air) | 2 | 32 | 1s | 1 | 2.75 tiles |
| Training Time of Minions | |
|---|---|
| Number of Dark Barracks that aren't under upgrade | Training Time |
| 1 | 36 seconds |
| 2 | 18 seconds |
| Level | Damage per Second | Hitpoints | Training Cost | Research Cost | Laboratory Level Required | Research Time |
|---|---|---|---|---|---|---|
| 1 | 35 | 55 | 6 | N/A | N/A | N/A |
| 2 | 38 | 60 | 7 | 10,000 | 5 | 5 days |
| 3 | 42 | 66 | 8 | 20,000 | 6 | 6 days |
| 4 | 46 | 72 | 9 | 30,000 | 6 | 7 days |
| 5 | 50 | 78 | 10 | 40,000 | 7 | 10 days |
| 6 | 54 | 84 | 11 | 100,000 | 8 | 12 days |
| 7 | 58 | 90 | 12 | 140,000 | 9 |  |
- Summary
- The Hog Rider is a rugged, dark-skinned man with a mohawk riding a large hog. He is bare-chested, wearing only a brown leather loincloth, a red belt and a pair of leather sandals. He has two large golden wristbands and a gold earring. His weapon of choice is a large warhammer.
- His mount is a large boar/hog, about half its rider's height; the Hog Rider holds a brown leather bridle which is looped around the boar's tusks.
- Because of his mount, the Hog Rider can jump over Walls, giving the user a great advantage over the enemy base.
- Although he has high damage per second and moderate hit points, he only takes 2 minutes to train.
- Hog Riders prioritize defensive structures above all other targets, and will bypass all other types of enemy buildings and troops while any defenses remain on the battlefield. This is true even if they are under attack by enemy Clan Castle troops, heroes or Skeleton Trap skeletons. Note that like all troops that prioritize defenses, Hog Riders do not consider the Clan Castle to be a defense regardless of whether or not it contains enemy troops, but do consider the defending Grand Warden to be a defensive building.
Once all defenses are destroyed, Hog Riders become like any other troop with no preferred target; they will attack the nearest building to them regardless of type, and will turn and attack enemy unitsif they become aware of any nearby.
- Offensive Strategy
- He can be used to jump over any level Walls, rendering them ineffective against Hog Riders. Note that while this allows Hog Riders free access to what lies behind the wall, it does not open up gaps for other troops to move through. If the Hog Riders need the support of other ground troops, you will still need to deploy Wall Breakers, a Jump Spell or Earthquake Spells in order to assist them.
- The Hog Rider could potentially be used in an extremely effective fashion similar to Barbarians, i.e. a "Hog Rider Rush", without requiring any Wall Breakers to break Walls. However, this would likely be a poor tradeoff of resources, as a large raid of Hog Riders would cost a significant amount of Dark Elixir.
- Hog Riders are quite capable of acting as distracting troops like Giants; they have nearly as much health as a similar-level Giant, move twice as quickly and do considerably more damage.
- They work well with the Healing Spell when you group several of them together.
- A good tactic for using Healing Spells is to place them strategically on a cluster of defenses (at least about 3 or more) and also deploy them shortly before the Hog Riders arrive in the area, i.e. deploy them ahead of the Hog Riders. This is so that the Hog Riders get the most out of the Healing Spell, and destroy the defenses without losing too much HP.
- Spots where a Giant Bomb or a pair of Giant Bombs may be lurking should be given special attention when deploying Healing Spells. Hogs of the same level as the Giant Bomb will survive a single Giant Bomb, but they're helpless against a pair of Giant Bombs even with a Healing Spell. Heal them after they've went through a Giant Bomb blast.
- The Hog Rider is the one of the best troop types for drawing out Clan Castle troops, as it can avoid Walls to penetrate deep enough to reach centrally-placed Clan Castles (and enough health to not die before it gets there). Deploy one or a few to trigger the Clan Castle troops, then lure the reinforcement troops to the corner side, and deploy multiple Archers or Wizards to slaughter them, and then deploy the remainder of your Hog Riders. This strategy is especially effective during Clan War raids. However, skeletons from the Skeleton Trap and Heroes can also easily kill the Hog Riders, as they can only target defenses, so make sure to have some troops that target anything.
- Hog Riders are helpless against airborne enemy Clan Castle troops, especially Dragons. Most mass Hog Rider strategies in Clan Wars require that the Clan Castle troops be killed first by luring. Bring other troops in addition to Hog Riders, such as Wizards, to deal with enemy Clan Castle troops and do clean up.
- Poison Spells can be used to kill almost any enemy Clan Castle troop, but beware as the troops will attempt to flee the poison. If the Poison Spells are decently leveled and you effectively keep the Clan Castle troops from escaping the Poison spell with distracting troops, they can eliminate almost any troop.
- A Poison Spell can be used to dispense of those pesky skeletons risen from the Skeleton Traps and even the lower health Clan Castle troops (such as Archers and Wizards).
- With multiple Poison Spells, it is possible to eliminate troops with higher health, especially Dragons. Just be sure to drop each Poison Spell only after the previous one has worn off.
- Time is also a factor to consider. With only 3 minutes in an attack, it is essential to make sure that this whole process, and the remainder of the attack is done as quickly as possible to avoid running out of time.
- Defensive Strategy
- Defending against Hog Riders is tricky, as their ability to bypass Walls renders them irrelevant. However, the fact that they can jump over walls and attack defenses means that they may leave behind their ground support (such as Barbarians, etc.), as they will not be able to follow. This will allow your interior defenses to concentrate on the Hog Riders.
- Another way to defend against Hog Riders is to exploit the fact that they will attack the closest defensive building. You can arrange your base in such a way so that you have high-powered defenses on the inside and lower-powered defense on the outside, with a layer of resources in between. That way, the Hogs will (in theory) complete a loop around your base before being able to attack your interior defenses (Inferno Towers, X-Bows, etc.), by which time they should have all been killed by the interior defenses.
- You can place Spring Traps in between Defensive Buildings to take out a few Hog Riders at a time; good usage of multiple Spring Traps can severely hinder a Hog Rider rush.
- Hog Riders can be easily killed using "forced pathing". Forced pathing is a strategy that manipulates the Hog Rider AI and make them go to at least 2 Defenses that cannot be prevented by surgical dropping or side clearing. Placing a set of Giant Bombs in between the two can most certainly guarantee you a defensive win.
- Clan Castle troops, Heroes, and Skeleton Traps set to Ground Mode can be an annoyance to mass Hog Rider raids, as Hog Riders will not attack them unless all defensive buildings have been destroyed. Make sure to centralize them if you want to beat Hog Riders.
- In Clan Wars, Dragons are excellent troops to place in Clan Castles against Hog Riders, especially for Town Halls 8 and 9. They have high HP, meaning they won't die easily, and can kill mass quantities of Hog Riders swiftly if not properly lured. Most mass Hog Rider strategies require that the enemy Clan Castle troops be killed first, so if the attacker lures out a Dragon, but fails to kill it, then a 3-star win is next to impossible, much less a 1-star win via destroying 50% of the buildings.
- Multi-target Inferno Towers can be a severe hindrance to Hog Riders, being able to block out healing effects, having high HP to take several hits from Hog Riders, while hitting large groups of them.
- Although the Hog Rider is certainly not a liability on defense, the fact that all defensive troops are unimpeded by walls negates the primary advantage of the Hog Rider. As of the 30 Jul 2013 update, they take up the same amount of housing space (5) as Giants but are much faster and do considerably more damage. They are also much less susceptible to Lightning Spell attacks than troops with small hitpoints, so they may be a good alternative for the Clan Castle if your clanmates don't mind donating Dark Elixir Troops.
- Defending against Hog Riders is tricky, as their ability to bypass Walls renders them irrelevant. However, the fact that they can jump over walls and attack defenses means that they may leave behind their ground support (such as Barbarians, etc.), as they will not be able to follow. This will allow your interior defenses to concentrate on the Hog Riders.
- Upgrade Differences
- Initially, the Hog Rider has a black mohawk and beard, and a gold earring in his right ear. He has two heavy golden wristbands, a red belt, and a brown loincloth. The Hog Rider's hammer has two brass bands.
- At level 3, the Hog Rider's hammer increases in size and turns black. The brass bands on the hammer's head disappear, and the hammer head goes further down onto the stick, creating a button looking object on the top of the hammer head.
- At level 5 his mohawk turns from black to orange, making it similar to that of a level 5 Goblin.
- At level 6 his hammer gains large golden spikes.
- At level 7, he gains a headband but reverts to a black mohawk.
- Trivia
- Though the Hog Rider appears in many ways to be a mounted barbarian, unlike the Barbarian, the Hog Rider's teeth appear to be in perfect condition.
- In the Clan Wars commercial, if you look carefully, you can see a gold tooth.
- When there are no defenses left and the Hog Riders are attacking a building, they do not attack Heroes nor Troops until they have destroyed the building.
- He has more than a passing resemblance to "Mr. T", an American actor.
- He was added in the 12 Mar 2013 update. On 27 Aug 2013 his training time was reduced from 5 minutes to 2, and he was given a preferred target (defenses).
- As of the 3 July 2014 update, Giant Bombs did 1.5X damage to Hog Riders.
- As part of the Friendly wars update, Hog Riders no longer receive 1.5X damage from Giant Bombs.
- You can have a maximum of 48 Hog Riders at one time in a complete set of fully upgraded Army Camps. This number increases to 55 if you include the 7 that can fit into a level 6 or higher Clan Castle. On the battlefield, you can clone an additional 14 Hog Riders with two fully upgraded Clone Spells.
- Hog Riders have the most legs of any troop with a total of six (including man and hog).
- The phrase "Did somebody say Hog Rider?" comes from the Clash of Clans TV commercial.
- This phrase originates from a popular meme, the "Did somebody say ___?" meme.
- A real-world Chinese farmer, Jiong Chengyou, rides his own pig, but not with a hammer. Click here for the video.
- A Hog Rider event lasted from UTC 10:00 20/12/16 through UTC 10:00 22/12/16, which functioned like a mini-achievement with limited time period. Hog Riders cost only 10% of the normal cost during these 2 days. Players needed to win three multiplayer battles, each with at least one fifth of total Army Camp housing space being Hog Riders (Town Hall 7 or above) or the Clan Castle full of Hog Riders (Town Hall 6 or below), to claim 300 Experience and 30 Gems. Players also got a chance to gain some Dark Elixir (up to 7,776 if they had level 6 Hog Riders) by queuing just before the end of the event and unqueuing after the event ended.
- Though the Hog Rider appears in many ways to be a mounted barbarian, unlike the Barbarian, the Hog Rider's teeth appear to be in perfect condition.
| Preferred Target | Attack Type | Housing Space | Movement Speed | Attack Speed | Dark Barracks Level Required | Range |
|---|---|---|---|---|---|---|
| Defenses | Melee (Ground Only) | 5 | 24 | 1s | 2 | 0.6 tiles |
| Training Time of Hog Riders | |
|---|---|
| Number of level 2 or higher Dark Barracks that aren't under upgrade | Training Time |
| 1 | 1 minute 30 seconds |
| 2 | 45 seconds |
| Level | Damage per Second | Hitpoints | Training Cost | Research Cost | Laboratory Level Required | Research Time |
|---|---|---|---|---|---|---|
| 1 | 60 | 270 | 40 | N/A | N/A | N/A |
| 2 | 70 | 312 | 45 | 20,000 | 5 | 5 days |
| 3 | 80 | 360 | 52 | 30,000 | 6 |  6 days 6 days |
| 4 | 92 | 415 | 58 | 40,000 | 6 | 8 days |
| 5 | 105 | 475 | 65 | 50,000 | 7 |  10 days 10 days |
| 6 | 118 | 535 | 90 | 100,000 | 8 |  12 days 12 days |
| 7 | 135 | 600 | 115 | 150,000 | 9 |  14 days 14 days |
- Summary"A master of the two-handed axe
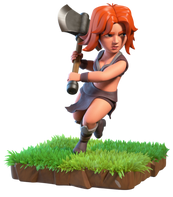 , this glorious warrior runs between nearby buildings and can shred several troops or buildings at once with her whirlwind blow!"
- The Valkyrie is a fierce warrior with flaming crimson hair, dressed in a long leather loincloth with matching leather brassiere and knee-high boots. She wields a massive double-bladed axe, which is about half of her size.
- The Valkyrie has a total of 5 levels.
- She takes up 8 spaces in an Army Camp.
- Valkyries have no preferred target when attacking; they will simply attack the closest building to them. However, once they become aware of enemy Clan Castle troops, Heroes or Skeleton Trap skeletons (either by being attacked themselves or being near another friendly troop under attack), they will leave their previously targeted building and engage the enemy troops instead. Once all of the nearby enemy troops are defeated, they will proceed to attack the nearest building from their current location.
- Offensive Strategy
- Drop the Valkyries near the defending Barbarian King at the start of an attack. These Dark Elixir Troops do a lot of damage on Heroes and are an easy way to get rid of the Barbarian King early; this makes the whole attack easier and much more effective.
- Using the Valkyrie against Clan Castle troops is a good idea, because they deal small area splash damage and will be able to take out groups of troops quickly and efficiently.
- The way Valkyries attack is by getting at least between two buildings and damages both at the same time. But if the buildings are not close to each other, then watch out for Traps hidden around them. (e.g. A Barracks near another one around a hidden Bomb.)
- Valkyries will immediately move to a different target right after killing an enemy troop or building, therefore resetting its attack pattern with little to no delay. Potentially attacking ten times every second as long as she keeps on one-shotting melee enemy troops such as a Barbarian.
- Valkyries are a worthy substitute for P.E.K.K.A in high level attacks. They are relatively tanky, not as vulnerable to Hidden Teslas and much faster than P.E.K.K.As. Their ability to eliminate Clan Castle troops, Heroes and the core of a defending village with their area of effect attack is impressive and their effectiveness when paired with Healing Spells is also favorable when compared to P.E.K.K.As.
- Valkyries, when granted access to the core of the base, can destroy it with no problem. Help them get to the core with your Jump Spells and assist them with Rage, Clone, and Freeze Spells once they are inside.
- Defensive Strategy
- Valkyries are extremely powerful troops and can be a problem to deal with; they do a lot of damage and have quite a bit of health (although nowhere near as much as a Dragon, P.E.K.K.A or Golem). Since her damage has a splash component, she can damage multiple Buildings at once. Thus it is not advised to group buildings together.
- Whenever Valkyries destroy a building, they will reposition themselves, which during that time, they could get shot down. Try to put buildings with different hitpoints together to hinder a Valkyrie army.
- Valkyries are wonderful Clan Castle troops. Their splash damage makes them extremely effective against large groups of lightly-armored, melee-range troops such as Barbarians and Goblins, though they are also very capable against groups of ranged troops such as Archers and even Wizards as well. On several occasions players have reported Valkyries to have single-handedly destroyed entire Goblin and Barbarian raids. She can only attack ground troops, however, and is completely ineffective against aerial units. Her moderate health allows her to survive a few hits.
- The Valkyrie is now much more vulnerable to the Poison Spell.
- The Valkyrie is particularly deadly when deployed among Barbarians as part of the Clan Castle complement; although she is a much more powerful troop, she is approximately the same size and can easily be missed in a group of Barbarians. Often it will take a few moments for the attacking player to notice her and understand why his or her ground troops are dying so quickly.
- The Valkyrie attacks nearby buildings that are close to each other such as a Barracks near another one, so put Traps around those buildings while making them close to each other as possible to deal damage or rid them.
- Upgrade Differences
- Initially, the Valkyrie is a tall skinny woman with a steel axe. She wears a bra-like chest cover and a cloth covering her lower half.
- At level 3, the Valkyrie changes her steel axe for a golden one.
- At level 5, the Valkyrie wears a black furry tunic similar to the level 6 Giant.
- Trivia
- Added with the 12 March 2013 update.
- As part of the 29 July 2013 update, the Valkyrie's damage was increased.
- The Valkyrie has the same original face design as the Archer.
- You can have a maximum of 30 Valkyries at one time in a complete set of fully upgraded Army Camps. This number increases to 34 if you include the 4 that can fit into a level 6 or higher Clan Castle. On the battlefield, you can clone an additional 8 Valkyries with two fully upgraded Clone Spells.
- Some players refer to her as a P.E.K.K.A with no armor, because she is female and has extremely high damage per second and hitpoints.
- The Valkyrie spins around with her heavy axe as she attacks, giving her a 360 degree attack range. This allows her to destroy multiple buildings at once, making them great for attacking in hordes.
- As part of the 3 July 2014 update, the Valkyrie has her AI adjusted to attack between two buildings within her attack range, making full use of her area splash damage. If one of the building is destroyed and if there are any adjacent buildings close by, she will move between the two buildings for a more efficient attack.
- When the Valkyrie attacks, grass flies off from around her.
- The Valkyrie very much resembles Natasha Romanoff (Black Widow), a character in the Avengers.
- After the March 21st 2016 update, the Valkyrie has increased damage and attacks immediately upon reaching her target, but has slightly reduced hitpoints.
- In the same update, her attack sound effect has been changed to sound similar to the Valkyrie in Clash Royale.
- Part of the May 4th 2016 update, the Valkyrie's training time has been decreased from 8 minutes to 5 minutes.
- Part of the October 2016 update, the Valkyrie's training time has been further reduced to 3 minutes.
| Preferred Target | Attack Type | Housing Space | Movement Speed | Attack Speed | Dark Barracks Level Required | Range |
|---|---|---|---|---|---|---|
| None | Area Splash 1 Tile Radius (Ground Only) | 8 | 24 | 1.8s | 3 | 0.5 tiles |
| Training Time of Valkyries | |
|---|---|
| Number of level 3 or higher Dark Barracks that aren't under upgrade | Training Time |
| 1 | 3 minutes |
| 2 | 1 minute 30 seconds |
| Level | Damage per Second | Damage per Attack | Hitpoints | Training Cost | Research Cost | Laboratory Level Required | Research Time |
|---|---|---|---|---|---|---|---|
| 1 | 94 | 169.2 | 750 | 70 | N/A | N/A |  N/A N/A |
| 2 | 106 | 190.8 | 800 | 100 | 50,000 | 6 | 8 days |
| 3 | 119 | 214.2 | 850 | 130 | 60,000 | 7 |  10 days 10 days |
| 4 | 133 | 239.4 | 900 | 160 | 70,000 | 7 | 12 days |
| 5 | 148 | 266.4 | 1,100 | 190 | 110,000 | 8 |  14 days 14 days |
- Summary
- The Golem is unlocked once the Dark Barracks is upgraded to level 4.
- The Golem is the most expensive Dark Elixir troop.
- Golems are extremely powerful tanking units that, upon death, split into two smaller Golemites that continue to do damage.
- Both Golems and Golemites do splash damage, similar to Balloons and Lava Hounds, when destroyed.
- Golems prioritize defensive structures above all other targets, and will bypass all other types of enemy buildings and troops while any defenses remain on the battlefield. This is true even if they are under attack by enemy Clan Castle troops, heroes or Skeleton Trap skeletons. Note that like all troops that prioritize defenses, Golems do not consider the Clan Castle to be a defense regardless of whether or not it contains enemy troops, but do consider the defending Grand Warden to be a defensive building.
Once all defenses are destroyed, Golems become like any other troop with no preferred target; they will attack the nearest building to them regardless of type, and will turn and attack enemy units if they become aware of any nearby.
- Offensive Strategy
- A good strategy is to release Golems and wait until all splash damage defenses like Mortars and Wizard Towers fire on them then release units like Archers and Barbarians.
- Since the Golems do small amounts of damage themselves, it´s important that they are backed up by high damage-dealing troops, like Wizards or Witches.
- Golems aren't affected by Spring Traps. However, when one becomes two Golemites, the Golemites will be affected by Spring Traps if they encounter them.
- If possible, destroy the Inferno Tower that is set on Single Target Mode as quickly as possible. Otherwise, they will wipe out your Golems. However, this is usually preferable to the Inferno Tower targeting a P.E.K.K.A, Barbarian King, or Archer Queen. A Freeze Spell can be used to temporarily disable the Inferno Tower and "reset" its damage. If the Inferno Tower is set on Multiple Target Mode, it will not be much of a problem to the Golem, although it is still a nuisance to the troops attempting to use the Golem as a meat shield.
- Defensive Strategy
- Golems, similar to Giants and Lava Hounds, are very high-health units that can be used to soak up fire (meat shields). Make sure that the Golem is in the middle or in range of most of your defenses, as the Golem can distract attacking troops very effectively for a considerable amount of time. Even when overwhelmed, the Golem does a surprising amount of splash damage, enough to kill all low-health units (including lower-level Giants), as well as even Hog Riders. Any remaining attackers will then have to deal with the two Golemites as well.
- Golems tend not to be in Clan Castles due to their high storage space, 30, which fills up a Level 5 Clan Castle by itself. Additionally, its damage output as well as speed are very low and its health can be undermined by Wizards. However, they make potentially good distractions, especially against the likes of low health troops.
- Upgrade Differences
- The Golem undergoes a significant graphic change at level 5.
- Initially, the Golem is a light gray shaded rock. The Golem has bright, elixir colored eyes with a slight glow.
- At level 3, the Golem's rocky exterior changes shade from a light gray to a darker gray. The eyes also become a darker purple with a slightly more significant glow.
- At level 5, the Golem gains purple, crystal-like spikes, quite similar to those on the level 3 Wizard Tower, and his entire body gains a purple/gray color. The eye color does not change but glows slightly stronger.
- At level 6, some of the Golem's crystal-like spikes change color to grayish-pink. Some more crystal-like spikes grow on his shoulders.
- The Golem undergoes a significant graphic change at level 5.
- Trivia
- The Golem was added in the 17 April 2013 update.
- You can have a maximum of 8 Golems at one time in a complete set of fully upgraded Army Camps. This number increases to 9 if you include the 1 that can fit into a level 5 or higher Clan Castle. On the battlefield, you can clone an additional 2 Golems with two level 3 or higher Clone Spells.
- Golems, Balloons and Lava Hounds are the only troops that deliver splash damage upon dying. This is in contrast to the Wall Breaker, which dies upon delivering splash damage.
- The Golem and Lava Hound are the only two troops that can fill a level 5 Clan Castle by themselves.
- The Golem very much resembles "the Thing", a character in Fantastic Four.
- Part of the May 4th 2016 update, the Golem's training time has been decreased from 45 minutes to 15 minutes.
- Part of the October 12th 2016 update, the Golem's training time has been decreased from 15 minutes to 10/5 minutes.
- The Golem's level 6 upgrade is tied with the Bowler's level 3 upgrade as the most expensive Dark Elixir upgrades.
- The Level 6 Golem resembles its Clash Royale counterpart.
- A Golem event lasted from UTC 8:00 14/1/17 through UTC 8:00 16/1/17, which functioned like a mini-achievement with limited time period. Golems cost only 10% of the normal cost during these 2 days. Players needed to win three multiplayer battles, each with at least two Golems (Town Hall 10-11) or one Golem (Town Hall 8-9) to claim 300 Experience and 30 Gems. Players also got a chance to gain some Dark Elixir (up to 11,872 if they had level 6 Golems) by queuing just before the end of the event and unqueuing after the event ended.
| Preferred Target | Attack Type | Housing Space | Movement Speed | Attack Speed | Dark Barracks Level Required | Range | Death Damage Radius |
|---|---|---|---|---|---|---|---|
| Defenses | Melee (Ground Only) | 30 | 12 | 2.4s | 4 | 1 tile | 1.2 tiles |
| Training Time of Golems | |
|---|---|
| Number of level 4 or higher Dark Barracks that aren't under upgrade | Training Time |
| 1 | 10 minutes |
| 2 | 5 minutes |
| Level | Damage per Second | Damage per Attack | Damage Upon Death | Hitpoints | Training Cost | Research Cost | Laboratory Level Required | Research Time |
|---|---|---|---|---|---|---|---|---|
| 1 | 38 | 91.2 | 350 | 4,500 | 450 | N/A | N/A | 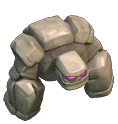 N/A N/A |
| 2 | 42 | 100.8 | 400 | 5,000 | 525 | 60,000 | 6 | 6 days |
| 3 | 46 | 110.4 | 450 | 5,500 | 600 | 70,000 | 7 | 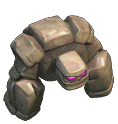 8 days 8 days |
| 4 | 50 | 120 | 500 | 6,000 | 675 | 80,000 | 7 | 10 days |
| 5 | 54 | 129.6 | 550 | 6,300 | 750 | 90,000 | 8 | 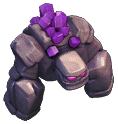 12 days 12 days |
| 6 | 58 | 139.2 | 600? | 6,600 | 825 | 200,000 | 9 | 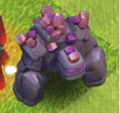 14 days 14 days |
- Summary
- Golemites are basically a smaller and less powerful version of the Golem.
- When a Golem dies, it splits into two Golemites.
- Both Golems and Golemites do splash damage, similar to Balloons, when destroyed.
- Golem/Golemites prioritize defensive structures above all other targets, and will bypass all other types of enemy buildings and troops while any defenses remain on the battlefield. This is true even if they are under attack by enemy Clan Castle troops, heroes or Skeleton Trap skeletons. Note that like all troops that prioritize defenses, Golem/Golemites do not consider the Clan Castle to be a defense regardless of whether or not it contains enemy troops, but do consider the defending Grand Warden to be a defensive building.
Once all defenses are destroyed, Golem/Golemites become like any other troop with no preferred target; they will attack the nearest building to them regardless of type, and will turn and attack enemy units if they become aware of any nearby.
- Offensive Strategy
- You cannot train or place down Golemites, as they only appear when a Golem dies.
- Unlike the Golems, the Golemites are affected by Spring Traps.
- Upgrade Differences
- The Golemite undergoes a significant graphic change at levels 3 and 5. The Golemites go through graphic changes whenever the Golem does, and gets the same change.
- At level 3, the Golemite's rocky exterior changes shade from light gray to a darker gray.
- At level 5, the Golemite gains purple, crystal-like spikes, quite similar to those on the level 3 Wizard Tower and his entire body gains a purple/gray color.
- The Golemite undergoes a significant graphic change at levels 3 and 5. The Golemites go through graphic changes whenever the Golem does, and gets the same change.
- Trivia
- Golemites (along with Golems) were added in the 17 April 2013 update.
- As one of the three subtroops (the others being the Skeleton and the Lava Pup), it cannot be trained, placed or donated directly via the Clan Castle (although the parent Troops can).
- The Golemite has 1/5 of Golem's Damage per Second, Damage Upon Death and Hitpoints.
- If you have a Golem in your Clan Castle, and it splits into Golemites during a defense, it will become a Golem again after the defense if at least one Golemite survives the battle.
- The Golemite is currently the only subtroop whose stats improve (rather than increasing the number spawned) when you upgrade the parent troop.
- Golemites attack slightly slower than Golems.
| Preferred Target | Attack Type | Movement Speed | Attack Speed | Range | Death Damage Radius |
|---|---|---|---|---|---|
| Defenses | Melee (Ground Only) | 12 | 3s | 0.5 tiles | 1.2 tiles |
| Level | Damage per Second | Damage per Attack | Damage Upon Death | Hitpoints |
|---|---|---|---|---|
| 1 | 7 | 21 | 70 |  900 900 |
| 2 | 8 | 24 | 80 | 1,000 |
| 3 | 9 | 27 | 90 |  1,100 1,100 |
| 4 | 10 | 30 | 100 | 1,200 |
| 5 | 11 | 33 | 110 |  1,260 1,260 |
| 6 | 12 | 36 | 120? | 1,3Buildings/Army |
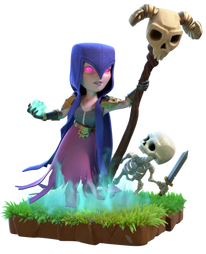
"The Witch never fights alone, constantly raising dead warriors. Upgraded Witches raise more skeletons at a time."
Summary
The Witch is a powerful troop that can summon dead warriors from past battles (Skeletons). She can be used as a support troop (similar to the way the Healer works) and when used correctly, can wipe a battlefield with ease.- The Witch has short purple hair that goes down to her shoulders and has glowing hot pink eyes. She wears two golden shoulder pieces, a golden belt, two gold bracelets, and a raggedy skirt. She also wears a raggedy purple cape and holds a staff with a goat's skull.
- Witchs have no preferred target when attacking; they will simply attack the closest building to them. However, once they become aware of enemy Clan Castle troops, Heroes or Skeleton Trap skeletons (either by being attacked themselves or being near another friendly troop under attack), they will leave their previously targeted building and engage the enemy troops instead. Once all of the nearby enemy troops are defeated, they will proceed to attack the nearest building from their current location.
- Offensive Strategy
- As she has low hitpoints, the Witch is recommended as a support troop, and should be placed near the back of an attack. Don't group Witches together or a Mortar may wipe them all out. Plus the Witch's Skeletons are good tanks to attract the attention of defense buildings.
- Drop a couple of Giants as distractions, with a few Wall Breakers shortly after. Then add 1-3 Witches and they will spawn Skeletons to help the Giants. When the Giants and Witches finish destroying the defenses, drop 1-4 additional Wall Breakers (depending on level) along with 1-4 Witches and more Giants.
- The Witch's Skeletons can help Giants destroy buildings.
- The Witch's Skeletons can easily overwhelm defenses, though splash-damaging buildings (Mortars and Wizard Towers) can wipe them out just as easily as they can be raised.
- If you have strong enough Lightning Spells, take out one or two Mortars at the start of the raid. This will greatly decrease the base's splash damage capability. More Skeletons will then stay alive longer acting as a distraction for the defense and will let your stronger troops take care of the rest.
- If you see a Witch on defense, a single Lightning Spell or Poison Spell is a convenient option to prevent wave after wave of Skeletons continually distracting your offensive troops.
- Using an all-Witch army, while not recommended due to the extreme cost, can potentially topple most base designs if supported by spells. Due to the fact that 22 level 3 Witches (the most you can have) can summon up to 220 skeletons in total, most defenses will often get swarmed. Mortars and Wizard Towers are the only defenses that can handle the Skeleton swarm. Beware that even high-level walls won't last long due to the additive damage of all the Skeletons. This strategy works as long as the Witches can reliably stay alive, once the Witches start to die, the Skeleton horde will drop in numbers which can result to a defeat.
- Defensive Strategy
- When using Witches as part of your Clan Castle complement, place the Clan Castle behind walls to protect her from being drawn out and killed easily.
- As Skeleton Traps are good for distracting P.E.K.K.As, so is a Witch. A protected Witch has the ability to destroy a P.E.K.K.A with ease.
- Asking for Giants with Witches is a great idea. With the same speed, the giants will be able to take off some heat from the Witches until their skeletons take over. This is, unless a Poison Spell will be used to kill the Witches.
- Upgrade Differences
- At levels 1 and 2, the Witch has a magenta dress with slightly crumpled ends and a few holes. She carries a staff capped by the skull of a ram with golden horns. Her hair is purple and goes down almost to the bottom of her dress. She appears to be carrying a walking stick.
- At level 3, the Witch gains a golden headdress. Her dress loses the holes and smoothes itself out. Her staff gains two golden rings around the handle.
- Trivia
- The Witch has approximately the same amount of health as a Wizard of similar level.
- Although she appears to have no feet, which makes it seem like she is levitating, she is actually a ground troop and will not be attacked by Air Defenses, nor will she float over Walls like the Grand Warden.
- In terms of health and damage output, the Skeletons that the Witch summons are slightly stronger than a level 6 Archer. However, the Skeletons have no ranged attack.
- In the Japanese language setting of the game, the Witch is called "Necromancer" literally.
- Necromancy is a form of magic involving communication with the deceased – either by summoning their spirit as an apparition or raising them bodily.
- You can have a maximum of 20 Witches at one time in a complete set of fully upgraded Army Camps. This number increases to 22 if you include the 2 that can fit into a level 4 or higher Clan Castle. On the battlefield, you can clone an additional 4 Witches with two level 2 or higher Clone Spells.
- Only a certain amount of Skeletons per Witch can be on the battlefield at the same time (see table below for details).
- Although summoned Skeletons look very similar to Wall Breakers, they are more likely to be Barbarians because they have a similar look, stance and attacking style.
- If you observe carefully, the Witch looks similar to the Archer, only much more "zombified".
- Witches don't require any graves on the battlefield to summon skeletons.
- Rage Spells don't speed up the Witch's Skeleton production.
- When summoning Skeletons, the Witch glows green and raises her scepter.
- When you have a Witch in your Clan Castle, and it creates Skeletons during a defense, the Skeletons that were made do not go back into the Clan Castle.
- The summoned Skeletons make upon-death skeletons.
- Witches attack with green fireballs.
- The Witch has the fastest attack speed of any troop.
- Counting the cost per housing space, the witch is the most expensive dark troop, with a cost of 21 dark elixir per housing space (at level 1), compared to the golem's cost of 15 dark elixir per housing space (at level 1) and the lava hound's 13 dark elixir per housing space (at level one). At level two, the witch's cost per housing space increases to 29 dark elixir. At level three, it increases to 38 dark elixir. So be careful when choosing to use the witch in a farming attack.
- Part of the March 21st 2016 update, the Skeleton hitpoints have been reduced and it can no longer trigger traps.
- Part of the May 4th 2016 update, the Witch's training time has been decreased from 20 minutes to 10 minutes.
- Part of the October 12th 2016 update, the Witch's training time has been decreased from 10 minutes to 3 minutes so long as both dark barracks are Witch capable.
- The same update also greatly increased the Witch's hitpoints, increasing the health by at least 140% at all levels.
- During late October 2016, the Witch's training cost was temporarily reduced and it's training time changed to 2 minutes to celebrate Halloween.
| Preferred Target | Attack Type | Summon Cooldown | Housing Space | Movement Speed | Attack Speed | Dark BarracksLevel Required | Range |
|---|---|---|---|---|---|---|---|
| None | Area Splash 0.3 Tile Radius (Ground & Air) | 6s | 12 | 12 | 0.7s | 5 | 4 tiles |
| Training Time of Witches | |
|---|---|
| Number of level 5 or higher Dark Barracks that aren't under upgrade | Training Time |
| 1 | 6 minutes |
| 2 | 3 minutes |
| Level | Damage per Second | Damage per Attack | SkeletonsSummoned | Hitpoints | Training Cost | Research Cost | Laboratory Level Required | Research Time |
|---|---|---|---|---|---|---|---|---|
| 1 | 50 | 35 | 3 (Limit 6) | 270 | 250 | N/A | N/A |  N/A N/A |
| 2 | 60 | 42 | 4 (Limit 8) | 300 | 350 | 75,000 | 7 | 10 days |
| 3 | 70 | 49 | 5 (Limit 10) | 330 | 450 | 160,000 | 9 |  14 days 14 days |
"This undead creature poses little threat by itself. But it never fights alone, since the Witch can summon an endless horde of Skeletons against your enemy!"
 |
| Level 1 |
- Summary
- Skeletons are troops the Witch summons to help her fight.
- They are similar to Barbarians in attack damage, but have lower health and move faster.
- The Skeleton gives out the same amount of damage per second as the level 1 Witch.
- Witch/Skeletons have no preferred target when attacking; they will simply attack the closest building to them. However, once they become aware of enemy Clan Castle troops, Heroes or Skeleton Trap skeletons (either by being attacked themselves or being near another friendly troop under attack), they will leave their previously targeted building and engage the enemy troops instead. Once all of the nearby enemy troops are defeated, they will proceed to attack the nearest building from their current location.
- They can be a good tank for single damage defense buildings in large numbers, but are vulnerable to splash damage.
- Offensive Strategy
- Skeletons act like Barbarians to Witches.
- They go hand in hand with the Jump Spell.
- Defensive Strategy
- Witches in your Clan Castle will summon hordes of Skeletons to confront the enemy.
- Single-targeting defenses like Cannons can be overwhelmed by Skeletons (especially if the single-target defense cannot one-shot the Skeleton), so splash-damaging defenses like the Mortar and the Wizard Tower are your defense's best chance of eliminating hordes of these subtroops. Have Mortars and Wizard Towers as high-leveled as possible; they can be able to one-shot Skeletons and this leaves the Witch vulnerable to the defenses. Inferno Towers set to multi-target are also good at eliminating a few Skeletons at a time.
- Trivia
- Like the Lava Pup, the Skeleton's stats do not change when the Witch is upgraded.
- You can have a maximum of 558 Skeletons fighting for you on the battlefield at any one time. Of these, 220 Skeletons come from 22 maximum-level Witches (20 from fully upgraded Army Camps and 2 from a level 4 or higher Clan Castle) that spawn 10 Skeletons each, and the other 338 come from 13 max-level Skeleton Spells (11 from your spell storage and the other 2 donated into your level 7 Clan Castle), that spawn 26 Skeletons each.
- When you have a Witch in your Clan Castle, and it creates Skeletons during a defense, the Skeletons that were made do not go back into the Clan Castle.
- As one of the three subtroops (the others being the Golemite and the Lava Pup), it cannot be trained, placed or donated directly via the Clan Castle (although the parent Troops can).
- The Skeleton is currently the only subtroop that is summoned (rather than spawned upon death) by its parent troop, and the only subtroop that is not a smaller version of its parent troop.
- The Skeleton appears to be identical to the Skeletons that are spawned via the Skeleton Spell and Skeleton Trap unless the latter is set to target air troops.
- Unlike the Skeleton Trap's skeletons, they do not have a skull next to their health bar.
- The skeleton is one of the two troops you can not level up, the other one being the Lava Pup.
| Preferred Target | Attack Type | Movement Speed | Attack Speed | Range |
|---|---|---|---|---|
| None | Melee (Ground Only) | 24 | 1s | 0.4 tiles |
 |  |  |
| Level 1 & 2 | Level 3 | Level 4 |
- Summary
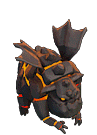
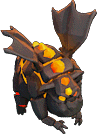
- The Lava Hound is like a flying fiery Golem, except its favorite target is specifically Air Defenses.
- The Lava Hound is a pyrotechnic (volcanic) hound-like creature with wings.
- Like the Golem, the Lava Hound deals additional splash damage when it dies, before splitting into Lava Pups.
- When the Lava Hound attacks buildings, it bounces up and down slightly while shooting little fireballs at it like a Minion.
- Lava Hounds prioritize Air Defenses above all other targets, and will bypass all other enemy buildings and troops while any Air Defenses remain on the battlefield. This is true even if they are under attack by enemy Clan Castle troops, heroes or Skeleton Trap skeletons. Once all Air Defenses are destroyed, they will continue to attack any other remaining defenses. Note that like all troops that prioritize defenses, Lava Hounds do not consider the Clan Castle to be a defense regardless of whether or not it contains enemy troops, but do consider the defending Grand Warden to be a defensive building.
Once all remaining defenses are destroyed, Lava Hounds become like any other troop with no preferred target; they will attack the nearest building to them regardless of type, and will turn and attack enemy units if they become aware of any nearby.
- Offensive Strategy
- Lava Hounds have a large amount of hitpoints. Much like Golems, they're useful as an attack tank, but for air units. They protect Dragons, Minions, Healers, Balloons and Baby Dragons, much like Golems protect a group of Wizards or Witches.
- They can distract Air Defenses, which prevents the Air Defenses from destroying a group of Dragons, Balloons or Minions.
- Be sure to keep it away from a single targeting Inferno Tower which can kill it with ease. It may be a good idea to bring a Freeze Spell if a single target Inferno Tower is present. The supporting troops will be able to destroy the Inferno Tower before it can take out the Lava Hound. A Multi-target Inferno Tower, while not being much problem to Lava Hounds, is very strong against the Lava Pups it splits into, so don't ignore it.
- It's a good idea to send Lava Hounds in pairs so it can soak up twice the amount of damage and to longer distract defenses from other air troops. However, don't use too many, as they are extremely weak offensive units and will be destroyed before they do too much damage to your enemy, even given their prodigious hitpoints.
- Lava Hounds may make high-level Giant-Healer strategies more viable, as one of the major reasons it previously failed at high levels was Air Defense damage and number of Air Defenses becoming too many. A Lava Hound may be able to keep the Healer alive substantially longer, giving the Giantsenough time to clear a path for the damage dealers.
- However, at TH level 10 or above, Giant-Healer is usually useless due to the presence of Inferno Towers which cancels any form of healing (via Healers or Healing Spells).
- Defensive Strategy
- Spreading your Air Defenses out is a good idea. This forces attackers to keep their air troops near the Lava Hounds for protection, making Air Bombs and Wizard Towers more effective. Also have Seeking Air Mines and Air Bombs close by your Air Defenses so it will be more likely to be triggered by Lava Hounds.
- Their weaknesses include Seeking Air Mines, which do significant damage against air troops.
- Be sure to use at least one single-targeting Inferno Tower, which will destroy a Lava Hound with ease.
- Lava Hounds are a good choice as a Clan Castle troop for level 5 Clan Castle or higher. While they do virtually no damage on their own, their tremendous hit points allows it to soak up a lot of damage from the attacker while the defenses fire upon them and upon popping, they break down into a Lava Pup which can deal a good amount of damage to the attackers particularly Wizards and Archer Queen.
- Upgrade Differences
- At level 1 and 2, the Lava Hound looks like an overweight dog like creature, with a round head and lumpy body, made of rock with cracks filled with lava. A row of scales made of rocks are on its back.
- At level 3, the spikes on its back turn into lava color. Its eyes also become larger and more red. The lava under the skin of the forearms also disappear, and its wings grow in size. It's glow changes a bit.
- At level 4, the lava on its back turn red.
- Trivia
- The Lava Hound was added in the 16 September 2014 update.
- The Sneak Peek picture of the Lava Hound features its head, bearing the words "I smell fireworks..."
- You can have a maximum of 8 Lava Hounds at one time in a complete set of fully upgraded Army Camps. This number increases to 9 if you include the 1 that can fit into a level 5 or higher Clan Castle. On the battlefield, you can clone an additional 2 Lava Hounds with two level 3 or higher Clone Spells.
- The Lava Hound bears a strong resemblance to the Lava Dragon from DragonVale, another popular mobile game.
- The Lava Hound is often compared to the Golem due to its similar statistics and concept (e.g. they have a lot of health but low damage, both taking 30 spaces, and once defeated, they do death damage and subtroops will continue to fight.)
- When clicking on an Army Camp, the Lava Hound turns away from the screen.
- Some refer the Lava Hound as the offspring of a Golem, Minion, or possibly an Inferno Tower because of the lava similarities.
- In the Russian localization of the game, the Lava Hound is called "Hell Hound" literally, sharing the same adjective as the Inferno Tower.
- The level 4 Lava Hound has the highest hitpoints among all troops; however, it has lower DPS per housing space (0.53) than any other troop, even lower than the level 1 Golem at 1.27 DPS per housing space.
- The Lava Hound takes up the most space of any troop in the Army Camp, along with the Golem (30 housing spaces).
- Part of the May 4th 2016 update, the Lava Hound's training time has been decreased from 45 minutes to 15 minutes.
- It is only troop that have three preferred target stages (Air Defense - Other Defensive Buildings - Any).
| Preferred Target | Attack Type | Housing Space | Movement Speed | Attack Speed | Dark Barracks Level Required | Range |
|---|---|---|---|---|---|---|
| Air Defense | Melee (Ground Only) | 30 | 20 | 2s | 6 | 1 tile |
| Training Time of Lava Hounds | |
|---|---|
| Number of level 6 or higher Dark Barracks that aren't under upgrade | Training Time |
| 1 | 10 minutes |
| 2 | 5 minutes |
| Level | Damage per Second | Damage per Attack | Damage Upon Death | Lava Pups Spawned (After Death) | Hitpoints | Training Cost | Research Cost | Laboratory Level Required | Research Time |
|---|---|---|---|---|---|---|---|---|---|
| 1 | 10 | 20 | 100 | 8 | 5,700 | 390 | N/A | N/A | N/A |
| 2 | 12 | 24 | 150 | 10 | 6,200 | 450 | 60,000 | 7 | 10 days |
| 3 | 14 | 28 | 200 | 12 | 6,700 | 510 | 70,000 | 8 | 12 days |
| 4 | 16 | 32 | 250 | 14 | 7,200 | 570 | 150,000 | 9 | 14 days |
"Thrust out in big numbers after a Lava Hound dies, these tiny creatures keep up the fight for a little while longer."
 |
| Level 1 |
- Summary
- Lava Pups are spawned when a Lava Hound falls in battle. Although they vaguely resemble their parent troop in appearance, they are significantly stronger offensively and have only a tiny fraction of the Lava Hound's health.
- When a Lava Hound dies, it splits into 8 Lava Pups at level 1, and increases by 2 with every level, capping at 14 Lava Pups at level 4.
- Lava Hound/Lava Pups have no preferred target when attacking; they will simply attack the closest building to them. However, once they become aware of enemy Clan Castle troops, Heroes or Skeleton Trap skeletons (either by being attacked themselves or being near another friendly troop under attack), they will leave their previously targeted building and engage the enemy troops instead. Once all of the nearby enemy troops are defeated, they will proceed to attack the nearest building from their current location.
- Offensive Strategy
- A group of Lava Pups can be wiped out by a single Air Bomb, so try to trigger it with the Lava Houndto make the Lava Pups live longer.
- Like all low health troops, they're vulnerable to Wizard Towers, so distract them with more durable units.
- Upgrade Differences
- There are currently no upgrade differences.
- Trivia
- Added in the 16th September 2014 update.
- They have nearly identical stats to a level 1 Minion, the only differences being slightly lower Hitpoints and a shorter range (2.75 tiles for the Minion vs. 2 for the Lava Pup).
- As one of the three subtroops (the others being the Golemite and the Skeleton), it cannot be trained, placed or donated directly via the Clan Castle (although the parent Troops can).
- While the Lava Hound appears to be made of both molten lava and solid rock, the Lava Pup seems to be a pure lava being, perhaps suggesting that the lava cools into rocks as the Lava Pups mature.
- The Lava Pups will explode out in a large circle when they are spawned, instead of clustering up where the Lava Hound falls.
- If you have a Lava Hound in your Clan Castle, and it splits into Lava Pups during a defense, it will be Lava Hound again with at least one of them survives the battle.
| Preferred Target | Attack Type | Movement Speed | Attack Speed | Range |
|---|---|---|---|---|
| None | Ranged (Ground & Air) | 32 | 1s | 2 tiles |
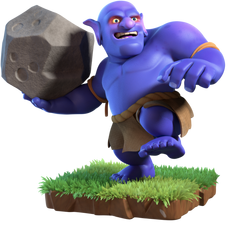
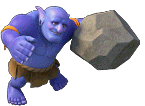
"This big blue dude digs the simple things in life - Dark Elixir drinks and throwing rocks. His massive boulders bounce off their targets and hit again behind it for double strike!"
 |  |
| Level 1 & 2 | Level 3 |
- Summary
- The Bowler is a deadly troop that throws a large boulder that bounces once dealing splash damage on the initial bounce and dealing splash damage when it lands.
- The Bowler is the first ground troop that's capable of attacking more than one target with splash damage in a straight line.
- Bowlers have no preferred target when attacking; they will simply attack the closest building to them. However, once they become aware of enemy Clan Castle troops, Heroes or Skeleton Trap skeletons (either by being attacked themselves or being near another friendly troop under attack), they will leave their previously targeted building and engage the enemy troops instead. Once all of the nearby enemy troops are defeated, they will proceed to attack the nearest building from their current location.
- Offensive Strategy
- The Bowler doesn't have a lot of hitpoints so it can be taken out when not protected, so be sure it is behind tanks like Golems or Giants.
- The Bowler can be a great unit for funneling due to their ability to be able to hit 2 structures at any given time. This allows better funneling compared to using Wizards.
- Defensive Strategy
- Upgrade Differences
- At initial level, the Bowler is a blue muscular humanoid creature that wears a loincloth around his waist bound to him with rope and carries a large boulder in the shape of a bowling ball. He has pointed ears and red, sunken eyes. His hands and feet resemble those of a Giant. He also has a yellow band on both arms.
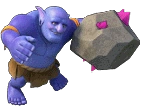
- At level 3, the Bowler's skin becomes a slightly darker blue like the level 3 Minion, and the boulder gains pink, elixir colored crystals sticking out of it, similar to the level 5 Golem.
- Trivia
- It was introduced in the March 21st 2016 update.
- You can have a maximum of 40 Bowlers at one time in a complete set of fully upgraded Army Camps. This number increases to 45 if you include the 5 that can fit into a level 5 or higher Clan Castle. On the battlefield, you can clone an additional 10 Bowlers with two level 3 or higher Clone Spells.
- When clicking on the Army Camp; like the Lava Hound, the Bowler turns away from the screen.
- The Bowler's level 3 upgrade is tied with the Golem's level 6 upgrade as the most expensive Dark Elixir upgrades.
- In May 4th 2016 update, the bowler's first attack starts faster, similar to the Valkyrie buffs.
- Part of the May 4th 2016 update, the Bowler's training time has been decreased from 8 minutes to 5 minutes.
- The May 24th 2016 update reduced the Bowler's housing space from 8 to 6.
- The Bowler was originally a troop idea for Clash Royale, but being scrapped was shared with Clash of Clans.
- Ultimately, the Bowler was now added in one of Clash Royale's updates.
- Also, the description in Clash Royale is similar to its description in Clash of Clans.
| Preferred Target | Attack Type | Housing Space | Movement Speed | Attack Speed | Dark BarracksLevel Required | Range |
|---|---|---|---|---|---|---|
| None | Area Splash | 6 | 14 | 1.5s | 7 | Two buildings directly behind one other (2) |
| Training Time of Bowlers | |
|---|---|
| Number of level 7 Dark Barracks | Training Time |
| 1 | 2 minutes |
| 2 | 1 minute |
| Level | Damage per Second | Damage per Attack | Hitpoints | Training Cost | Research Cost | Laboratory Level Required | Research Time |
|---|---|---|---|---|---|---|---|
| 1 | 65 | 97.5 | 290 | 130 | N/A | N/A | N/A |
| 2 | 75 | 112.5 | 310 | 150 | 120,000 | 8 | 10 days |
| 3 | 85 | 127.5 | 350 | 170 | 200,000 | 9 | 14 days |
thanks for visiting
:)..........
No comments:
Post a Comment